


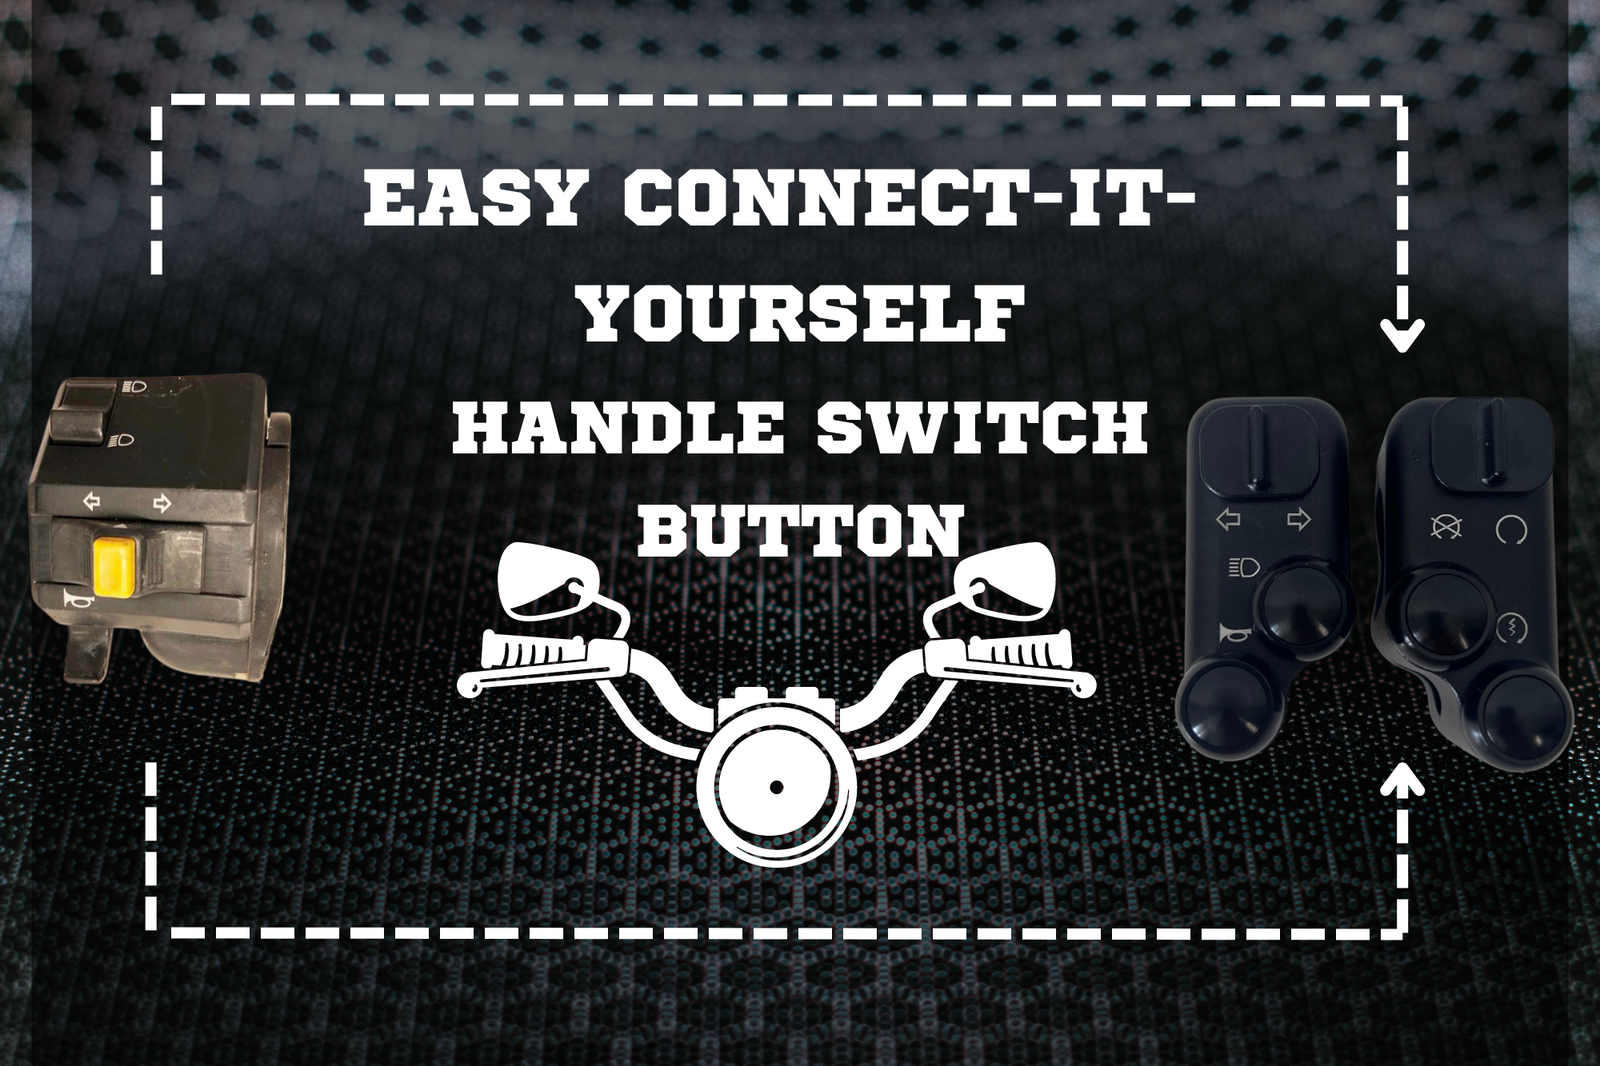

I have purchased a new pair of handlebar controls, and I would like to install them myself.
Good news! With our installation tutorial, you will be able to install your new set of electrical controls step by step. One advice, take your time, be methodical.
Connecting controls to a motorcycle depends on the motorcycle model and the controls you are using. Our installation tutorial is based on a basic installation.
First, make sure you can reconnect all essential functions that you use on your new controls.
Controls are usually integrated control devices on the handlebars, allowing you to control functions such as turn signals, headlights, horn, etc.
Required Tools:
Steps:
1- Disconnect the Battery
Before working on the motorcycle's electrical system, disconnect the battery to prevent accidental short circuits.

Tips: Disconnect the negative terminal first. When reconnecting the battery, connect the - terminal last.
2- Remove the Old Controls
Remove them by unscrewing the screws and disconnecting the electrical connectors on the motorcycle's wiring harness.
If you found this article helpful to connect motorcycle controls, let us know in the comments.
3- Button Identification
Make sure to keep the same type of button to reproduce the same function (momentary, latching 2 positions, or 3 positions).
You can also use an additional module to use other types of buttons. For example, our Flash Relay module from Axel Joost allows the use of momentary buttons.
This module records your request and programs it in a defined time (e.g., short press = 3 seconds on, long press = 10 seconds on).
Example of button types commonly found on motorcycles:
Single Function (e.g., HORN):
ON - OFF (momentary 2 positions, two wires)
The principle of the momentary button: I press and release, the button returns to its initial position.
SIDE LIGHT:
ON - OFF (latching 2 positions, two wires)
The principle of latching operation: I press and release, the button remains in the pressed position. I press and release again to return to the initial position.
Dual Function:
LEFT TURN SIGNAL - RIGHT TURN SIGNAL
ON - OFF - ON (latching 3 positions, three wires) The OFF being the "common" for the two functions assigned to the switch.
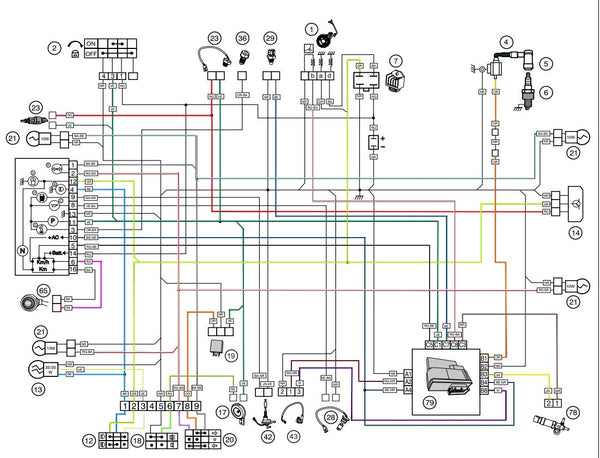
4- Electrical Diagram (optional ++)
You can find the electrical diagram of your motorcycle on the Internet.
This will require a little reading exercise, but we can help you in case of trouble.
This optional ++ will help you understand the colors of the electrical wires for the various switches.
5- Identification of Wire Colors
Identify the cables of the original switches of the motorcycle.
The colors of the wires may vary from one motorcycle to another, but some conventions generally exist.
For example, green or yellow are often used for turn signals, blue for high beams, white for low beams, etc. Use a multimeter to determine the contacts:
Using the multimeter in a video
Use this type of table to note the color of the wires for the different switches:
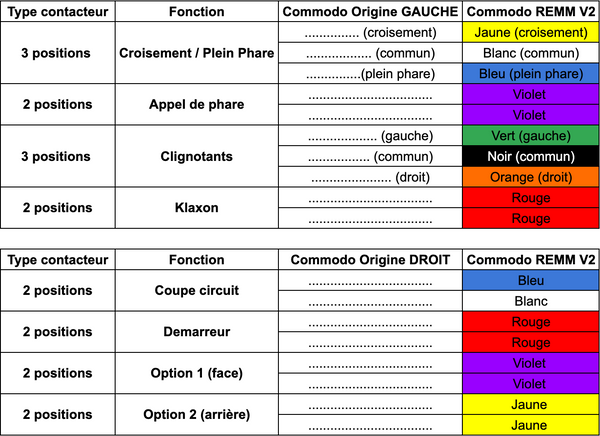
Use the Original Switch column to note the wire color in front of each function.
6- Connection of New Switches
Associate the cables with the new switches. The REMM switches come with the wiring diagram to easily identify the different functions.
If you want to keep your original main harness, we recommend recovering the plugs from the original switches.
To do this, cut the wires of the switches with some margin to strip and connect the new switches.
To cleanly connect the electrical wires together, you can either solder them with tin and then protect them with heat shrink tubing or a 2-in-1 solution is to use solder sleeves:
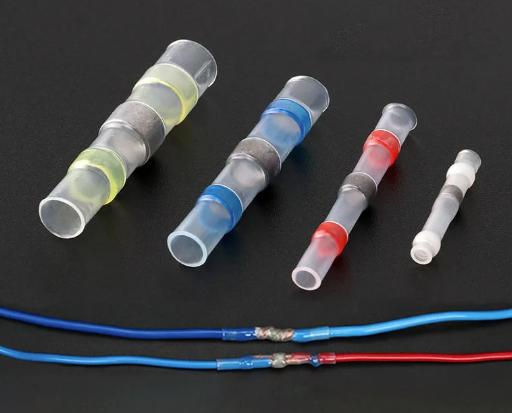
The solder sleeves are ideal for those who do not know how to solder or simply for people who want to save time.
Indeed, you just have to place the two stripped wires in the sleeve and heat with a heat gun to solder and shrink the sleeve.
7- Testing
Once the connections are made, restore power to the battery and test the switches.
Check that the turn signals, lights, and other functions are operational.
8- Mounting the Switches
Once everything is working correctly, securely mount the new switches on the handlebars.
9- Cable Protection
Make sure to protect the cables against friction and external elements by securing them properly and using insulating sleeves if necessary.
Also, use plastic clamps (rilsan) to neatly attach your electrical harnesses along the handlebars and frame.
Turn your handlebar to full right and left lock to check for any tension in the electrical wires.
10- Final Check
Perform a final test to ensure that everything is working correctly.
Note:
If you don't feel comfortable doing it yourself, it is recommended to seek help from a professional or a motorcycle mechanic.
Motorcycles can have complex electrical systems, and errors in wiring can cause operational problems.
Remmotorcycle supports you in your projects, which is why you can rely on our technical support to help you in case of problems.
To facilitate the installation of motorcycle switches, we offer Plug & Play versions. These versions have original connectors. You just need to unplug and replug the electrical control connectors of your motorcycle.
Can't find your motorcycle in Plug and Play version? Contact us!
We are also able to make custom switches with predefined functions.
If this article helped you connect motorcycle switches easily, let us know in the comments.
Comments will be approved before showing up.